By Thomas Drake, Founder & Owner — A New Leaf Painting Contractors
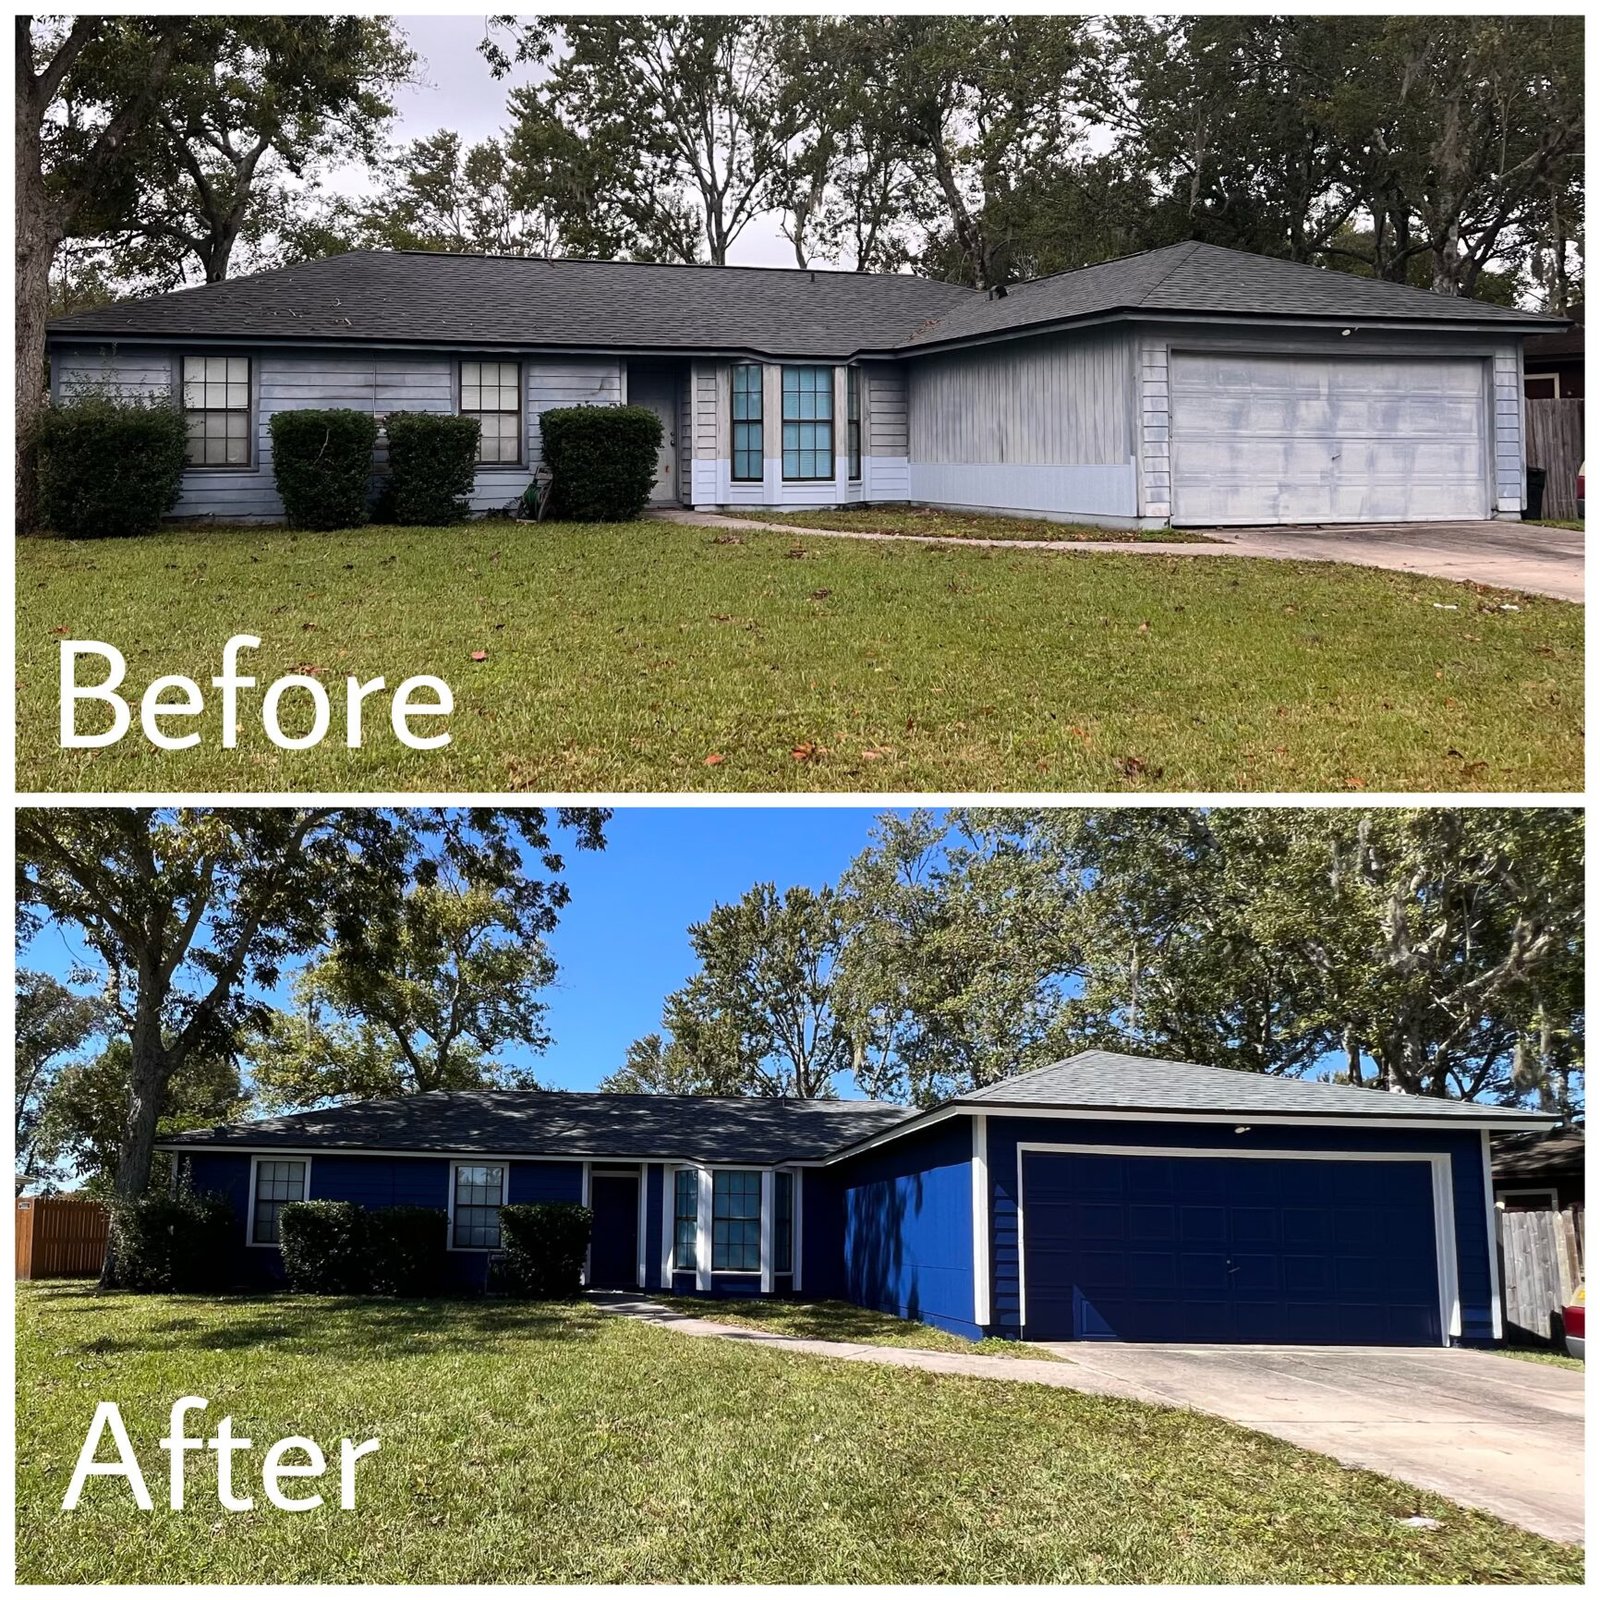
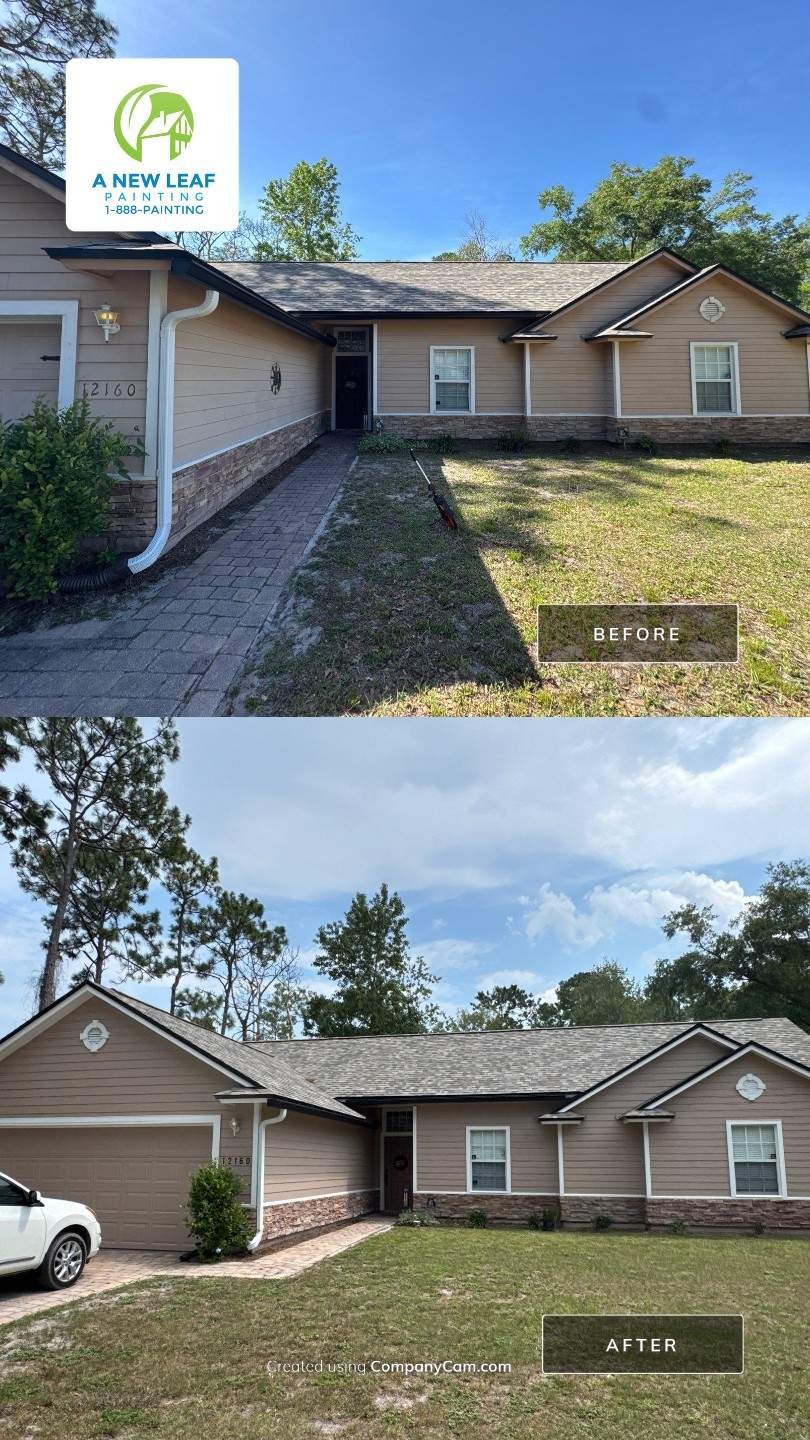
Stucco dominates Jacksonville’s exterior landscape — but it doesn’t own it entirely. Across Northeast Florida’s most established neighborhoods and its newest master-planned communities, a significant number of homes feature wood siding, vinyl siding, aluminum siding, cedar shingles, fiber cement, and garage door surfaces that require their own preparation approach, product specification, and application technique.
Get the surface-specific requirements right and your exterior painting investment performs for the better part of a decade. Get them wrong — wrong primer, wrong product, wrong sheen, or skipped preparation steps — and you’re looking at peeling, cracking, and fading within two to three years regardless of how good the paint color looks on the day it goes on.
A New Leaf Painting Contractors has been painting Northeast Florida homes since 2010, with 5,000+ completed projects across Jacksonville, Ponte Vedra Beach, Nocatee, Mandarin, Fleming Island, Orange Park, Middleburg, and the surrounding communities. In 15 years we’ve painted every exterior surface type this market produces. This guide gives Jacksonville homeowners the complete picture on siding painting — surface by surface, step by step, product by product.
If you’re looking for a painting contractor who understands the difference between painting vinyl siding and painting wood siding — and why that difference matters — this is the guide for you.
Why Surface Type Matters More Than Most Homeowners Realize
The single most common exterior painting mistake in Jacksonville is treating all siding surfaces the same way. A painter who applies the same primer, the same product, and the same technique to wood siding, vinyl siding, and aluminum siding is not doing the job correctly — he’s doing a version of it that will fail on at least two of those three surfaces within a few years.
Each siding material has different porosity, different thermal expansion and contraction characteristics, different surface chemistry, and different failure modes in Jacksonville’s subtropical climate. The right preparation process, primer selection, product specification, and application technique are specific to each surface type.
In Jacksonville’s UV-intense, high-humidity environment these differences are amplified. A product that performs well on smooth fiber cement may not bond correctly to chalky aluminum. A sheen that looks great on wood siding can highlight every imperfection on vinyl. A primer that works on bare wood will not provide adequate adhesion on a previously painted aluminum surface that hasn’t been properly cleaned and abraded. This is the same reason surface preparation drives the outcome more than product selection does.
This guide covers every major exterior siding surface type present in Jacksonville’s residential market. Find your surface, read the full section, and use it to evaluate any painting contractor you’re considering for your project.
Wood Siding Painting in Jacksonville FL
Wood siding is the most demanding exterior surface to paint correctly in Jacksonville’s climate — and the most rewarding when it’s done right. The combination of Florida’s humidity, UV intensity, and temperature swings creates conditions that challenge every aspect of a wood siding paint job from adhesion to flexibility to moisture resistance.
Where You’ll Find Wood Siding in Jacksonville
Wood siding is concentrated in Jacksonville’s older and historic neighborhoods. Ortega, Avondale, Riverside, San Marco, and Beauclerc carry significant wood siding residential stock from the mid-twentieth century and earlier, and Arlington’s mid-century ranch homes include a meaningful proportion of wood siding and wood accent elements.
In newer construction, engineered wood products — LP SmartSide in particular — appear on select builds throughout St. Johns and Clay County.
Why Wood Siding Is Demanding in Florida’s Climate
Wood expands and contracts with humidity and temperature changes — and Jacksonville delivers both in abundance. That expansion and contraction cycle stresses the paint film at joints, end grain, and lap edges. A paint film that isn’t flexible enough to move with the wood will crack and peel at these stress points within a few years regardless of product quality.
End grain — the exposed cut ends of wood siding boards — is the most vulnerable point on any wood siding installation. End grain absorbs moisture far more readily than face grain and must be sealed thoroughly during preparation before any primer or topcoat is applied. Contractors who don’t address end grain specifically are leaving the most critical moisture entry point on your wood siding unprotected.
Rotten wood is the other major consideration. Jacksonville’s humidity creates favorable conditions for wood rot, and older wood siding frequently has rot at corners, window sills, and areas of concentrated moisture exposure. Painting over rotten wood seals moisture in, accelerates decay, and causes the paint film above it to fail. All rotten wood must be identified, removed, and replaced before any painting begins — we cover the full process in our guide to rotten wood repair and exterior painting. Our carpentry repair service handles this as an integrated part of exterior painting preparation, not as a separate project that delays your paint start.
Wood Siding Preparation: The Complete Process
Pressure washing removes dirt, mildew, chalk, and loose paint. Jacksonville’s humidity means mildew is present on the majority of wood siding exteriors that haven’t been recently painted. Mildew must be treated during washing — painting over active mildew traps a living organism under the film, and on a porous surface like wood it will continue to grow and push the coating off.
Scraping and sanding any areas of loose, peeling, or flaking existing paint down to a firm edge. Feathering the edges of scraped areas prevents visible ridges telegraphing through the new paint film.
Rotten wood identification and repair — every linear foot of siding, every window sill, every corner board, and every piece of trim is inspected for soft spots, discoloration, and structural compromise. Rotten wood is replaced completely before painting proceeds.
End grain sealing on all exposed cut ends of siding boards before primer application.
Caulking at all window frames, door frames, trim intersections, and penetrations with a premium paintable exterior caulk rated for Florida conditions.
Dedicated exterior wood primer on all bare wood surfaces — not a universal primer, a wood-specific exterior primer that penetrates the wood fiber and creates genuine adhesion for the topcoat. On previously painted surfaces in sound condition, a bonding primer is applied to ensure topcoat adhesion across the full surface.
Two full coats of premium exterior finish — complete coverage, proper film thickness, allowing appropriate flash time between coats.
Product and Sheen Specification for Wood Siding
Sherwin-Williams Emerald Exterior in satin is our usual specification for wood siding painting in Jacksonville. Emerald’s flexibility accommodates wood’s expansion and contraction cycle, its UV resistance protects color in Florida’s sun, and its moisture resistance helps the film resist Jacksonville’s humidity at the surface. The satin finish provides enough sheen for durability and cleanability while remaining forgiving on wood siding’s natural texture variations.
Sherwin-Williams Duration Exterior in satin is our standard alternative where Emerald is not specified. Duration is a 100% acrylic exterior coating that builds a heavier film than most exterior acrylics, and that film thickness is what carries it through wood’s seasonal movement. It is not an elastomeric coating — elastomerics are a separate product class specified for masonry and stucco, not for wood siding. If you want the full comparison, we wrote one: the difference between Duration and Emerald.
Benjamin Moore Aura Exterior is an excellent alternative for homeowners with specific color requirements. Aura’s self-priming characteristics and flexibility make it a strong performer on wood siding in Jacksonville’s climate.
Sheen guidance: satin on body, semi-gloss on all trim. The combination provides durability where it’s needed — on trim surfaces that take physical contact and concentrated moisture exposure — while keeping the body sheen low enough to be forgiving on wood siding’s natural surface variation. Our guide to paint sheens for Jacksonville homes walks through the reasoning in more detail.
What We See on Wood Siding Repaints in Jacksonville
Across the wood siding repaints we’ve performed in Northeast Florida, properly prepared wood siding finished with a premium exterior acrylic generally reaches somewhere in the range of seven to ten years before the whole house needs to come back around. That’s our field observation, not a manufacturer specification — exposure, orientation, tree cover, and irrigation overspray all move the number. Trim elements almost always need attention before the body does, particularly at the most exposed corners and window sills where moisture concentrates. Annual inspection of caulk lines and trim joints, with spot treatment as needed, meaningfully extends the full repaint interval.
Vinyl Siding Painting in Jacksonville FL
Vinyl siding painting in Jacksonville is a specialized application that requires specific product knowledge most homeowners — and frankly many painting contractors — don’t have. The critical considerations are product selection and color choice, and getting either one wrong produces failures that are expensive to correct.
Where You’ll Find Vinyl Siding in Jacksonville
Vinyl siding appears primarily in Jacksonville residential construction from the 1980s through the early 2000s. Baymeadows, portions of Mandarin, Southside, Arlington, Orange Park, Middleburg, and Fleming Island all include vinyl siding residential stock from this era, as do earlier phases of some St. Johns County communities.
The Critical Vinyl Siding Painting Rules
Rule 1 — VinylSafe color selection is non-negotiable. This is the most important thing a Jacksonville homeowner needs to know about vinyl siding painting. Painting vinyl siding a color with a significantly lower Light Reflectance Value than the original factory color causes the vinyl to absorb more heat than it was engineered to handle — which can produce warping, buckling, and distortion of the siding panels. That is not a paint failure. It is a heat-load failure caused by incorrect color selection, and it means replacing siding, not repainting it.
Sherwin-Williams VinylSafe colors are formulated for application on vinyl siding at LRV values that stay within vinyl’s thermal tolerance. Any painting contractor who doesn’t raise this issue before painting your vinyl siding is not protecting your investment. If you want to understand the underlying number, we explain how to determine a paint color’s Light Reflectance Value.
Rule 2 — Surface preparation determines adhesion. Vinyl siding must be thoroughly cleaned before painting — not just rinsed, but cleaned with appropriate detergent solutions that remove oxidation, chalk, mildew, and the surface contamination that accumulates on vinyl over years of Florida sun and humidity exposure. Paint applied to inadequately cleaned vinyl will not bond properly and will peel early.
Rule 3 — Primer selection matters on chalky or oxidized vinyl. Older vinyl siding that has oxidized significantly — chalky residue that transfers to your hand when you rub the surface — requires a bonding primer before topcoat application. Standard exterior primers don’t provide adequate adhesion to heavily oxidized vinyl surfaces.
Vinyl Siding Preparation Process
Thorough pressure washing with appropriate cleaning solution — mildew treatment where present, degreasing at areas of accumulated contamination, full surface cleaning before inspection.
Surface assessment — checking for chalking, oxidation, cracking, panel damage, and failed caulk at all penetrations and trim intersections.
Bonding primer application on oxidized or chalky surfaces. Spot prime any areas of significant oxidation before the full-surface primer coat.
Caulking at all window frames, door frames, trim intersections, and utility penetrations.
Two full coats of VinylSafe exterior finish — complete coverage, appropriate film thickness, proper flash time between coats.
Product Specification for Vinyl Siding
Sherwin-Williams Emerald Exterior or Duration Exterior in VinylSafe colors is our standard specification for vinyl siding painting in Jacksonville. Both products bond effectively to properly prepared vinyl, provide the UV resistance Florida’s climate demands, and are available across the VinylSafe color range.
Sheen guidance: satin on vinyl siding body. Satin provides durability and cleanability while remaining forgiving on vinyl’s surface profile. Semi-gloss on all trim elements.
What We See on Vinyl Siding Repaints in Jacksonville
Properly prepared and painted vinyl siding using a premium exterior acrylic in VinylSafe colors typically holds up in the same range as wood in our experience — roughly seven to ten years in Jacksonville’s climate. The two factors that shorten vinyl siding paint life most reliably are inadequate surface preparation before application and color selection outside the VinylSafe range. Both are entirely within a professional painting contractor’s control.
Aluminum Siding Painting in Jacksonville FL
Aluminum siding is among the oldest siding materials in Jacksonville’s residential stock — homes in Ortega, Avondale, San Marco, Arlington, and Beauclerc from the 1950s through 1970s frequently feature original aluminum siding that, with proper preparation and painting, can perform beautifully for another decade or more.
The Aluminum Siding Challenge in Florida
Aluminum siding oxidizes. In Jacksonville’s humidity and UV environment, aluminum siding that hasn’t been recently painted develops a chalky, oxidized surface layer that is the primary preparation challenge for aluminum siding painting. Paint applied to oxidized aluminum without proper surface treatment will not bond — it will adhere initially, then release as the oxidation layer continues to separate from the underlying metal.
Aluminum siding also dents, and dents visible from the street should be addressed before painting. Minor dents can be filled with an appropriate exterior filler and feathered smooth before priming. Significant dent damage may warrant panel replacement.
Aluminum Siding Preparation Process
Pressure washing to remove surface contamination. In Jacksonville’s humidity, mildew and chalk accumulation on aluminum siding is significant and must be fully removed before any further preparation.
Hand or mechanical sanding of oxidized areas to remove the oxidation layer and expose clean metal for primer adhesion. This step is the most labor-intensive part of aluminum siding preparation and the step most frequently skipped by contractors cutting corners.
Spot treatment of dents with exterior filler, feathered smooth and sanded before priming.
Caulking at all trim intersections, window and door frames, and penetrations.
Bonding primer formulated for metal surfaces — not a general exterior primer, a metal-specific bonding primer that creates adhesion between the aluminum surface and the topcoat. This is the critical product selection step for aluminum siding painting.
Two full coats of premium exterior finish.
Product Specification for Aluminum Siding
Sherwin-Williams Emerald Exterior or Duration Exterior over a metal-specific bonding primer is our specification for aluminum siding painting in Jacksonville. The bonding primer is the foundation everything else depends on — without it, topcoat adhesion on aluminum is compromised regardless of product quality.
Sheen guidance: satin on aluminum siding body. Semi-gloss on all trim.
What We See on Aluminum Siding Repaints in Jacksonville
Aluminum, when it is properly prepared, holds paint well — better than most homeowners expect. The metal substrate doesn’t expand and contract with humidity the way wood does, which reduces the film stress that causes cracking and peeling on organic siding materials. On the aluminum repaints we’ve done with a metal bonding primer and a premium acrylic topcoat, we generally expect somewhere around eight to twelve years before the house comes back around, with the caveat that everything depends on how thoroughly the oxidation was removed on day one.
Cedar Shingle Painting in Jacksonville FL
Cedar shingles are a specialty exterior surface found primarily in Jacksonville’s historic districts — Avondale, Riverside, Ortega, and San Marco — on Craftsman, Colonial Revival, and Bungalow architecture where shingle siding is architecturally appropriate. Cedar shingles require the most thorough individual surface preparation of any siding material and deliver the most distinctive finished appearance when done correctly.
Cedar Shingle Painting Considerations
There is a persistent piece of bad advice about cedar that costs homeowners real money: the idea that new cedar should be left to weather for a few months before it’s painted. It should not. The Western Red Cedar Lumber Association’s guidance is the opposite — cedar should be finished as soon as practical after installation, and once it has weathered beyond roughly two weeks, more extensive surface preparation becomes necessary. Weathering degrades the surface fibers of the shingle, and a coating applied over degraded fibers fails at the fiber, not at the film. If your contractor tells you to let new cedar sit through a Florida summer before painting it, get a second opinion.
What is true about cedar is that its natural oils and water-soluble extractives can interfere with coating adhesion and bleed through a topcoat as tannin staining. That’s a primer problem, not a waiting problem, and it’s solved with the right primer rather than with time.
Jacksonville’s humidity also encourages mildew growth on cedar more aggressively than on most other siding materials. Cedar’s porous, organic surface is a favorable mildew substrate, and thorough mildew treatment during preparation is critical for long-term performance.
Individual shingle replacement — cracked, split, or missing shingles — should be completed before painting. Damaged shingles painted in place will continue to fail and create moisture entry points that compromise the surrounding painted surfaces.
Cedar Shingle Preparation and Product Specification
Thorough pressure washing with mildew treatment. Allow complete drying — cedar requires longer dry time than stucco or vinyl due to its porosity.
Individual shingle inspection and replacement of damaged or missing shingles.
Back-priming — applying primer to the back face of any replacement shingles before installation to seal the raw cedar and equalize moisture absorption.
A stain-blocking exterior primer on bare cedar. Oil-based and shellac-based primers have a long track record of sealing cedar’s extractives and preventing tannin bleed-through; modern stain-blocking acrylic primers rated for cedar also perform well. What matters is that the primer is specified to block extractive bleed — a general-purpose exterior primer is not. On previously painted cedar in sound condition, a high-quality acrylic bonding primer is appropriate.
Two full coats of a premium exterior acrylic finish — brushed on individual shingles for complete coverage of all exposed edges and surfaces. Spray application on cedar shingles requires back-rolling to ensure the coating is worked into all surface profiles.
Sheen guidance: flat or low-sheen satin on cedar shingle body. Flat is particularly effective on cedar because it lets the natural texture of the shingles read visually rather than reflecting light that flattens the dimensional appearance. Semi-gloss on trim.
What We See on Cedar Repaints in Jacksonville
Cedar is the most maintenance-intensive siding material we work on in Florida’s humidity, and our field expectation reflects that — roughly six to eight years on a properly primed and painted cedar shingle exterior before a full repaint, meaningfully shorter than what we see on wood lap siding or fiber cement. Annual inspection of caulk lines and damaged shingles matters more here than on any other surface.
Fiber Cement Siding Painting in Jacksonville FL
Fiber cement — HardiePlank, HardieShingle, and similar products — is the premium siding specification for newer residential construction across Jacksonville and Northeast Florida. Communities including RiverTown, Seven Pines, eTown, Palencia, and custom builds throughout St. Johns and Clay County frequently feature fiber cement siding on premium construction. We cover the material in depth in our guide to painting James Hardie fiber cement siding.
Why Fiber Cement Repaints Are Different From the Original Factory Finish
Fiber cement arrives from the factory primed, and in most cases with a finish coat applied under controlled conditions. When that factory finish ages — generally ten to fifteen years before a first repaint is needed — the surface requires specific preparation to ensure adhesion of the new finish coat.
Factory finish on fiber cement becomes increasingly porous as it ages in Florida’s UV environment, which means the surface can absorb topcoat unevenly without adequate primer preparation, producing inconsistent sheen and color. Proper preparation for a fiber cement repaint includes thorough cleaning, assessment of the existing factory finish condition, and application of a quality acrylic exterior primer before the topcoat.
Fiber Cement Preparation and Product Specification
Pressure washing to remove chalk, mildew, and surface contamination. Fiber cement in Jacksonville’s humidity develops mildew at lap joints and in areas of reduced air circulation.
Assessment of existing finish condition — areas of significant chalk, peeling, or adhesion failure are scraped, cleaned, and spot-primed before full-surface primer application.
Acrylic exterior primer across the full surface before the topcoat — not optional on fiber cement repaints regardless of existing finish condition.
Two full coats of a premium exterior acrylic in satin finish.
Sheen guidance: satin on fiber cement body. The smooth profile of fiber cement handles satin effectively without the sheen drawing attention to surface imperfections the way it would on textured stucco. Semi-gloss on all trim.
What We See on Fiber Cement Repaints in Jacksonville
Fiber cement is the longest-performing painted siding surface in this market. Ten to fifteen years is the interval we plan around on a properly prepared and painted fiber cement exterior, and it’s the same range we publish in our James Hardie guide. Fiber cement’s dimensional stability — it doesn’t move with humidity the way wood does — keeps the paint film under far less stress than on organic siding materials, and that is most of the reason for the longer service life.
Garage Door Painting in Jacksonville FL
Garage door painting is one of the most frequently overlooked exterior painting line items in Jacksonville — and one of the highest curb appeal returns a homeowner can get for the money. On homes where the garage door represents a significant portion of the front facade, an updated garage door color has a disproportionate visual impact relative to its cost.
Garage Door Color Across Jacksonville’s Market
Builder-standard white is still the default on most Northeast Florida garage doors, and it’s the single most common thing homeowners ask us to change once the rest of the exterior has been repainted. It’s a request we get often enough that we now raise it during the estimate rather than waiting for the customer to bring it up.
Matching the garage door to the body color creates a clean, unified appearance. Choosing a complementary accent tone — deep charcoal, warm greige, or soft sage — creates deliberate contrast that frames the garage visually and adds architectural interest. Which approach is right depends on the architecture and the facade proportions, which is one of the things a color consultation is for.
Garage Door Surface Types and Their Preparation Requirements
Steel garage doors are the most common type across Jacksonville’s residential market. Steel doors oxidize in Jacksonville’s humidity and salt air exposure — particularly in coastal areas including Atlantic Beach, Neptune Beach, Jacksonville Beach, and Amelia Island. Oxidized steel must be sanded and primed with a metal-specific primer before topcoat application, and any rust must be treated with a rust-inhibiting primer first.
Fiberglass garage doors require a bonding primer before topcoat application. Standard exterior primers don’t provide adequate adhesion to fiberglass surfaces.
Wood garage doors — found on custom builds and historic homes across Ortega, Avondale, and San Marco — require the same preparation as wood siding: pressure washing, inspection for rot or damage, wood-specific exterior primer, and two coats of premium exterior finish.
Product Specification for Garage Doors
Sherwin-Williams Emerald Exterior or Duration Exterior in satin or semi-gloss over the appropriate substrate primer. Semi-gloss on garage doors provides maximum durability and cleanability — garage doors get touched, bumped, and hosed off, and semi-gloss holds up to that contact better than lower-sheen finishes. Satin is appropriate for homeowners who prefer a less reflective finish.
What to Ask Any Jacksonville Siding Painting Contractor Before You Sign
The preparation requirements covered in this guide are the standard for professional exterior siding painting in Jacksonville — not optional upgrades. Before signing any exterior painting estimate, ask these questions:
The answer should be specific — not “we clean it and prime it,” but a detailed description of cleaning, inspection, repair, primer selection, and application process specific to your siding type.
A New Leaf Painting Contractors: Siding Painting in Jacksonville
We’ve been painting exterior siding in Jacksonville and Northeast Florida since 2010 — wood lap siding and cedar in the historic districts, aluminum on mid-century stock, vinyl across the eighties and nineties subdivisions, fiber cement across the newer master-planned communities from Julington Creek to Nocatee, and garage doors on all of it.
We’re the most reviewed painting contractor in Northeast Florida, with 700+ verified five-star reviews across Google, Angi, Nextdoor, Facebook, Yelp, Houzz, and BBB. We’re licensed and insured, we specify Sherwin-Williams and Benjamin Moore premium exterior lines, and our exterior work carries a written workmanship warranty running five to ten years depending on the product system specified — the ten-year term is the Sherwin-Williams Emerald system. The full terms are on our guarantee and warranty page, including our Iron-Clad Guarantee: the project isn’t complete until the workmanship in the approved scope meets the standard set in your proposal.
Wondering what your siding painting project will cost before you call? Our exterior painting cost guide breaks down real Jacksonville pricing by home size and surface type, with no guessing and no surprises.
Call or text: 904-615-6599
A New Leaf Painting Contractors has been protecting and transforming Jacksonville homes since 2010. Whether your project calls for exterior painting, interior painting, stucco repair, cabinet painting and refinishing, or concrete coatings, our team handles it under one roof using premium Sherwin-Williams® and Benjamin Moore® products. Our exterior painting cost guide, interior painting cost guide, and concrete coating cost guide break down real Jacksonville pricing so there are no surprises.